Introduction
SecureCall offers customers (merchants) different ways for their staff to take payments by phone.
This document describes the steps staff take when using the SecureCall Web Client to take their customers' payments over the phone.
The four simple steps mapped out below are:
1. Login to the web client.
2. Secure the phone call with their customer, and enter sales-related information.
3. Monitor the customer's progress as they enter their card details.
4. Submit the payment.
Please note: This process can also be followed when SecureCall is embedded in the Webex clients or your CRM application. In most cases, the 'login' steps below have been automated for you.
This process can be followed using the SecureCall Dummy Gateway (installed on day one, a test card can be found here) or your Payment Gateway once the service has gone live.
Log in To The SecureCall Web Page
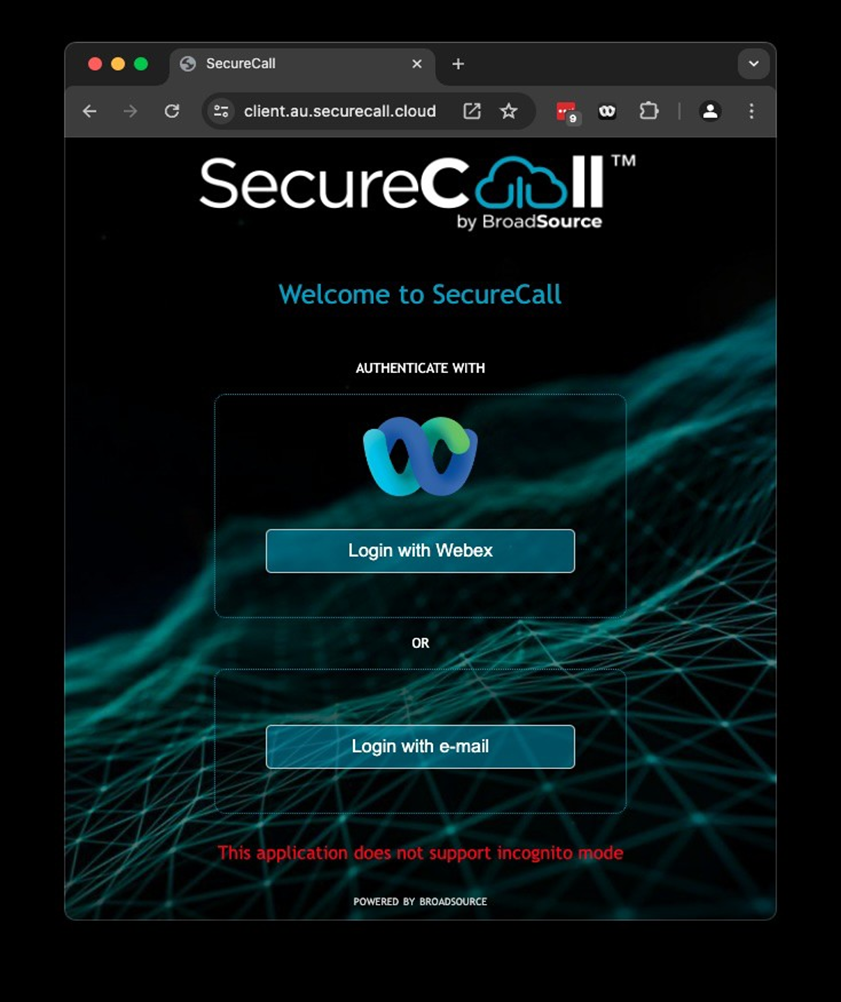
From your browser, visit:
SecureCall Web Client at: https://client.securecall.cloud
PLEASE NOTE: Make sure that you are not browsing in Incognito Mode.
You have two ways to log into SecureCall:
Log in to SecureCall using your Webex credentials. Click on the 'Login with Webex' button.
You will be authenticated by Webex and redirected back to SecureCall.
OR
For non-Webex users, you will have been sent a password from SecureCall to your nominated email address.
Please use your email and this password to log in.
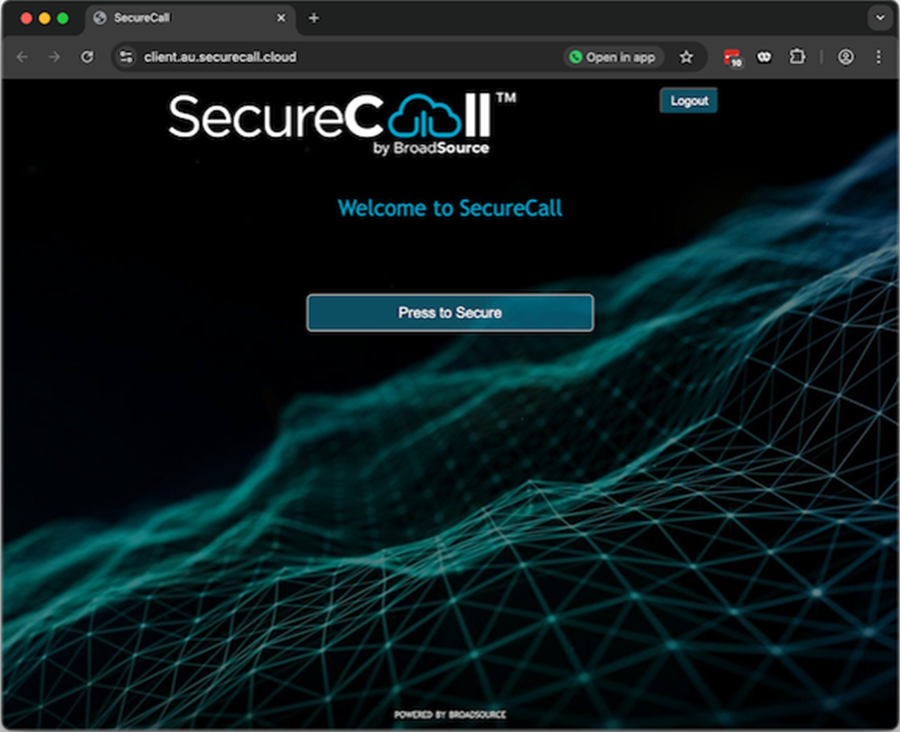
Once successfully logged in, your calls are ready to be secured, and you will be taken to the screen below.
Make Sure Your Cloud Telephone Service Is Operating
The SecureCall application runs in conjunction with your Cloud telephone service.
By logging into SecureCall, a connection is made between your phone service and the SecureCall Web Client.
Please make sure your phone service is operating normally, and you can make and receive phone calls.
Securing the Call
A call must be ‘active’ to be secured. That is, you will need to be talking to your customer before attempting to 'secure the call.'
At any time during that conversation with your customer:
1. Bring the SecureCall browser window into focus (where you have the SecureCall page running).
We suggest you say something like this to your customer:
"Great, now before I take your payment,
I will just secure this call so that you don't need to speak your details to me.
I'll get you to type them into the keypad of your phone when ready."
2. When you are ready, click on the "Press to Secure" button.
a. You can do this in moments just before you want to take the customer's payment.
b. There is no need to secure the call until then.
Once you see the page present the payment details, we suggest you say something like this to your customer:
"OK. That's done. The call is secured."
If you have accidentally closed that window, simply go back to the SecureCall Web Page - https://client.securecall.cloud and log in again, even if you are already on a phone call with the customer. No need to hang up etc.
Entering Sales Details
Once the call is successfully secured, you and your customer will still be in conversation.
Only once the call has been successfully secured will the payment transaction window be presented to you. So, you can assured you won't see or hear the card details as the customer enters them.
You will be entering details in the first three fields.
Your customers will be entering their card details in the bottom three fields using their phone keypad.
We suggest you say something like this to your customer:
"Great, now that this call is secured, you can go ahead and type your card details into the dial pad of your phone. Let's start with the card number, and if you could finish with a hash."
The customer’s card details are masked and shown as an asterisk (*).
You can see their progress, but you cannot interact with the bottom three fields.
If at any point the customer makes a mistake, you can let them know that you can reset that field for them using the reset button.
Once a field is successfully entered, a tick is shown.
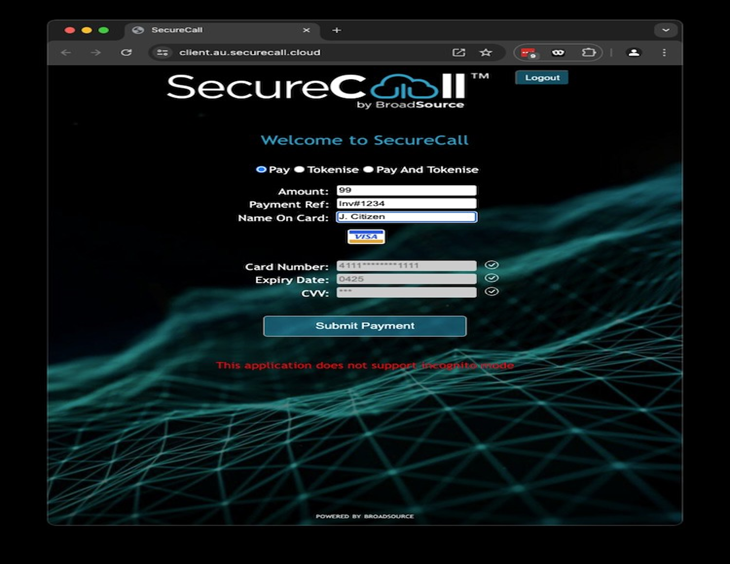
Once you have all the details entered, the Submit Payment button will change from opaque to solid. Clicking it will submit the payment.
Entering Sales Detail
Once the payment is successful, you will receive a confirmation message from your Payment Gateway provider with the Transaction ID and Receipt Number.
At this point, either you or the customer can choose to make another payment by selecting the button at the bottom of that window or by completing your call. A hang-up will take you back to the Secure Call window.
The following describes each of the fields:
Payment Action
To only pay once, select Pay.
To pay once and store the card details as a ‘token’, select Pay and Tokenize.
To only store the card details, select Tokenize.
Amount
This is the amount to pay, in dollars and cents. There is no need to add a $ sign.
Payment Reference
This is a unique reference for this payment, which will be used by your finance department to perform reconciliation and can be used as a receipt number if required by the customer.
Token Reference
If you are tokenizing the card, this is a unique reference for this tokenization, which can be passed to your payment systems for future payments.
Name on card
The name on the card is to be used by your customer for this payment. Ask the customer to provide it. For some banks, this must be an exact match.
Card
This is the card number, which is entered by the customer on their keypad and ends with a hash (#). Please ensure that they do not read out this number to you.
Expiry
This is the expiry date of the card, which is entered by the customer on their keypad, in the format DDYY and ending with a hash (#). This must be a date in the future (i.e., beyond the current month). Please ensure that they do not read out this number to you.
CVV
This is the security code on the card, which is entered by the customer on their keypad, ending with a hash (#). This must be either 3 or 4 digits (depending on the card). Please ensure that they do not read out this number to you.